I thought this article was funny. I mean, you would think that pediatricians would get it right most of the time... But even they aren't sure when kids should stay home from child care.
At least they are erring on the side of caution. Most of the criteria the peds didn't get right had them keeping the kids home when they weren't sick as opposed to letting them go when they are.
Friday, November 25, 2005
Wednesday, November 16, 2005
Harcourt Releases System for Handheld Computers that Assesses Children in Kindergarten through Second Grades
Leading test developer and publisher Harcourt Assessment, Inc. has introduced the Early Childhood Observation System(TM) (ECHOS(TM)), which combines technology with ongoing observation in the classroom to help teachers easily monitor the progress of young learners and guide instruction in grades K - 2.
Designed to work on the Palm OS(R) handheld computer, ECHOS makes it easier for teachers to do what they already do -- observe their students in the classroom while they are naturally engaged in every-day activities and monitor what grade-level skills, knowledge or behaviors a student consistently demonstrates or needs to develop.
"The beauty of ECHOS is that it enables teachers to teach and assess at the same time," said Don Barfield, vice president of educational products for Harcourt Assessment. "Because children learn and grow in different ways and at different rates, it can be challenging to assess and monitor the progress of an entire classroom. We developed ECHOS to provide a simple, uniform method for observing and monitoring the progress of young learners and then provide teachers the feedback and information they need to develop effective classroom strategies to ensure that all students can demonstrate essential grade-level skills."
Teachers who have tried ECHOS have reacted favorably. "The teachers loved using the handheld computers for assessing the kids! They were simple and made recordkeeping very easy," said Annette Alberti, a reading specialist and Title I coordinator from Pleasant Grove, Calif.
ECHOS was developed with the guidance of a national panel of early childhood and subject matter experts to ensure that ECHOS evaluates the whole child across the following seven developmental areas: language and literacy; mathematics; social and personal skills; science; social studies; physical development and fitness; and creative arts.
Based on their observations of specific benchmark behaviors in these seven areas, teachers can assign one of four performance levels: not yet demonstrating, emerging, progressing or consistently demonstrates.
Teachers can download their observations to a personal computer and receive immediate feedback from Web-based classroom and student reports that help them plan and implement effective instruction. Home reports in English or Spanish also provide suggested activities that can help parents reinforce or develop their child's skills.
While ECHOS was designed to operate most efficiently on a handheld computer, the system is flexible, so teachers can record their observations on paper then enter them into a personal computer and still receive the same student, classroom and home reports.
Web-based interactive professional development is available to help teachers learn to use ECHOS effectively. It includes instruction on observational assessment, as well as video highlights of early elementary classrooms and teachers.
ECHOS is aligned to the guidelines and standards of the following organizations: National Association for the Education of Young Children (NAEYC); International Reading Association (IRA); National Council of Teachers of English (NCTE); National Research Council Committee on the Prevention of Reading Difficulties in Young Children; National Council of Teachers of Mathematics (NCTM); Center for Science, Mathematics, and Engineering Education (CSMEE); National Council for the Social Sciences (NCSS); Center for Social and Emotional Education (CSEE); National Association for Sport and Physical Education (NASPE); National Arts and Education Information Network (ArtsEdge); National Association for Music Education (MENC); National Dance Association (NDA); Collaborative for Academic, Social, and Emotional Learning (CASEL).
Based in San Antonio, Harcourt Assessment is a leading provider of high-quality assessment instruments and testing programs used by educators, psychologists, speech-language pathologists, occupational therapists, human resource professionals, admissions and credentialing professionals, and businesses. Through the development of custom statewide educational testing programs, Harcourt is helping more than 20 states meet the accountability requirements of the federal No Child Left Behind Act.
The company is a unit of Harcourt Education, which is the global education brand of Reed Elsevier Group plc (NYSE:RUK) (NYSE:ENL). Reed Elsevier is a world-leading publisher and information provider operating in the science and medical, legal, education and business-to-business industry sectors.
For more information about ECHOS, visit www.echosonline.com.
Visit Harcourt Assessment on the Web at www.HarcourtAssessment.com.
Monday, November 14, 2005
Sample Preschool Lesson Plan Form Based on Learning Centers
This form is a one-page lesson planner that is based on activities in learning centers, with areas for teacher directed activities like what will be discussed in circle time and what art project will be done. There is also an area for art center where you can put in whatever new materials you will have available there.
There is room on the plan for the date, theme and other areas of focus like letters, numbers, shapes and colors.
.pdf version of the sample preschool lesson plan form based on learning centers
Microsoft Word version of the sample preschool lesson plan form based on learning centers
There is room on the plan for the date, theme and other areas of focus like letters, numbers, shapes and colors.
.pdf version of the sample preschool lesson plan form based on learning centers
Microsoft Word version of the sample preschool lesson plan form based on learning centers
Friday, November 11, 2005
Infant Lesson Planning Form
This lesson planning form can be used to make weekly individual plans for infants and young toddlers.
Write the name and age of the child in the left column box and then fill in the boxes in that row with activities.
It's a good idea to plan activities based on each child's needs. For example, if a very young baby hasn't yet learned to roll over from front to back, a good activity for that child might be some "directed tummy time." You can place the child on a blanket or mat on the floor and hold a toy or rattle to the side and in front of the child so that they will reach for it.
Many times when babies do this, their reaching arm will be forward and the weight of their head and the act of reaching will cause them to roll over. If you do this with them a little each day, they make the connection between the movements involved and rolling over, and they can do it themselves.
So, on the form, I would put "directed tummy time" knowing what I meant and I would explain what it is to the parent so that they can do this at home and help reinforce the learning.
Some may eschew the idea of babies having "lesson plans" or planned activities, but there are many skills that are being learned during this time that you can help them with, little by little. You don't want to be specifically "teaching" these things, or trying to force them to develop skills faster... but you can take cues from each child about his or her own rate of development and assist them in their learning.
.pdf version of weekly infant lesson planning form
Microsoft Word version of infant lesson planning form
Teacher Self-Evaluation Form
When doing performance evaluations, it's always a good idea to have teachers complete a self-evaluation first. Then you can see what areas the teacher feels are strengths and weaknesses. Also, if a teacher gives herself high marks for something and you had planned on writing up as an area that needs improvement, you can plan on handling that area more delicately. Along the same lines, some teachers may see themselves as weak in a certain area, while you find their performance to be above average. Take the opportunity to let that teacher know about a job well done.
Here is a form you can use to perform teacher self-evaluations. You can download the .pdf and print as is, or you can download the Word version and change the wording to suit your setting.
Thursday, November 10, 2005
Sample Enrollment Form
An enrollment form is more than just a place for contact information. It can be a place to learn more about the child who will be in your care. Knowing information like what a child's favorite toys are or how a parent soothes their crying baby can be so valuable.
Below you will find links to a sample enrollment form. You can save and print the .pdf version or you can download the Word document and make changes to reflect your own setting.
.pdf version of sample enrollment form
Microsoft Word version of sample enrollment form.
Below you will find links to a sample enrollment form. You can save and print the .pdf version or you can download the Word document and make changes to reflect your own setting.
.pdf version of sample enrollment form
Microsoft Word version of sample enrollment form.
Sample Family Child Care Provider Contract
This contract is a sample agreement between parents and a family child care provider. You can download the .pdf version and print it or you can download the Word version and make changes to reflect your own business and policies.
Having a contract is important. It's tempting, because of the sometimes informal nature of relations between parents and home providers, to do business on a handshake. Many providers have gotten "burned" this way. Usually because of payment issues, but other issues arise as well. It's hard to enforce a policy when it's not in writing and the parent didn't know about it beforehand.
For example, if your hours of operation are 8:00 to 6:00 and you have a parent consistently coming at 6:30, it's easier to keep this in check when you have a signed agreement that you can point to and say -- you signed this, you agreed to it, there is a charge for late pick-ups and I'm going to have to charge it if you're late in the future.
You need time to unwind when the day is over. You need time to clean up and have time for yourself and your own family. Make sure that your policies reflect this. It's one thing to be bending and flexible when necessary, but it's another to let your business take over your life. Some parents will take advantage if they can, so offer them clarity from the start, and the relationship will be much better for it.
Note, too, that in many states, a contract like this is required before providers can become licensed. And even if it isn't, a contract like this can fulfill licensing requirements like having hours of operation in writing, having a written discipline policy, notifying parents of immunization requirements, etc.
.pdf version of sample family child care provider contract
Microsoft Word version of sample family child care provider contract
Tuesday, November 8, 2005
Arts and Crafts with Kudzu
I mentioned in the last post about using kudzu.
Kudzu is, for most, an irritating weed that takes over and kills native bushes, plants and trees.
You can harness the power of this fast-growing plant in your classroom by making baskets, trees, ornaments and even paper.
Here are some kudzu resources:
Kudzu Art -- The baskets that Regina Hines makes would make an interesting addition to your setting for storage of books, toys or other items. They could be used to make gifts for Mother's Day. She's also made wreaths, Christmas trees, angels and cornucopias, all appropriate group projects for this time of year.
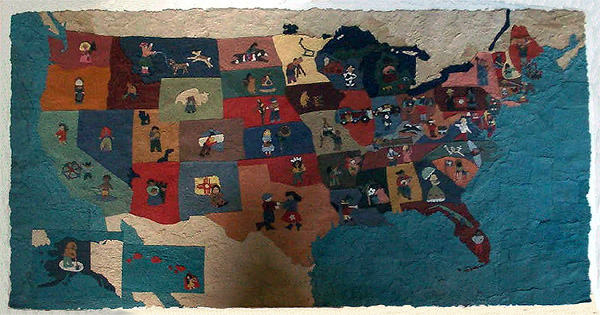
Kudzu Paper -- Nancy Basket made an amazing map using kudzu paper. It was displayed at the Southern Early Childhood Education Association convention in 2004. (picture here) You can make your own paper projects with the insructions at her site.
A great book to have as a resource is Kudzu in America . It has historical information, tips on usage (like cooking, clothing and crafts) and has over 150 photographs.
Kudzu is, for most, an irritating weed that takes over and kills native bushes, plants and trees.
You can harness the power of this fast-growing plant in your classroom by making baskets, trees, ornaments and even paper.
Here are some kudzu resources:
Kudzu Art -- The baskets that Regina Hines makes would make an interesting addition to your setting for storage of books, toys or other items. They could be used to make gifts for Mother's Day. She's also made wreaths, Christmas trees, angels and cornucopias, all appropriate group projects for this time of year.
Kudzu Paper -- Nancy Basket made an amazing map using kudzu paper. It was displayed at the Southern Early Childhood Education Association convention in 2004. (picture here) You can make your own paper projects with the insructions at her site.
A great book to have as a resource is Kudzu in America
Bored with your Bulletin Boards?
If you're tired of the same-old, same-old, and you'd rather pull out your fingernails than rip off another piece of primary colored butcher paper to cover your bulletin boards -- try something different.
The holidays are upon us and it's a good time to start thinking about spicing up your bulletin board repertoire.
Here are some tips:
The holidays are upon us and it's a good time to start thinking about spicing up your bulletin board repertoire.
Here are some tips:
- Don't use butcher paper. One way to start breaking away from this is to first experiment with other papers. Wrapping paper, wallpaper, tissue paper, cellophane, tin foil and newspaper are all good choices. Or try to find papers that are different, for instance try something with a shiny or metallic finish.
- Don't lay it flat. Typically, teachers slap up the butcher paper and are careful to smooth it out before they staple it in place. Experiment with different textures. Before hanging it up, crinkle it, bend it, fold it... stuff newspaper under it. Tissue paper and cellophane are especially good for this.
- Use something other than paper. Fabrics, plastics, metal, wood, paint or wall texturing (spackle is cheap), beads, string, ribbon, leather... One of the cutest bulletin boards I ever made was around this time of year. I had a classroom of three-year-olds and we were learning about the color brown. As an open activity in the art area, I would let two at a time come and cut brown paper with me in whatever shapes they wished (or could manage. At the end of the day I was left with... what looked like a lot of potatoes. So I decided to expand on that theme and talk about Thanksgiving foods. We made mashed potatoes the next day and did some potato prints and I made a bulletin board that was covered with a thin layer of straw and I fashioned a burlap sack for each child and carefully affixed their "potatoes" to the sacks.
- Don't forget about your border. Couple a new type of border with your choice. For instance, if you find a wrapping paper with a subtle pattern that you want to use, pair it with a border of cloth ribbon. The easiest ribbons to work with are those with wire edging. It's bendable and stays in place without having to staple it to smithereens. You might also use feathers, beads, indian corn glued onto paper, bamboo, tiles for a mosaic effect, legos, old postage stamps (begin having parents save these from letters they've gotten), old fashioned pop bottle lids (like those that you need the opener for), old compact discs (like the AOL discs, glue new labels on them that have cute names of computer programs that reflect what you're learning or have your students' names on them. Let them decorate their own...)
- Get ideas anywhere you go. Spend a few hours walking around your favorite craft store with your bulletin boards in mind. Or go to a home improvement store. Do not think about anything else while you're there, just browse the aisles and think, "Could I use that on a board?" You'll be surprised what you might see.
For example... this month, there are already lots of things out for the winter holidays. So I might see that I could make border out of silver, gold or holly garland.
I might stroll into the dollhouse department and see all the miniatures and find an idea for a bulletin board that involves making a house of sorts, I could use wallpaper scraps for each room, and buy or make (or have the children make) tiny furniture for each room. I could use old shingles or pieces of wood to fashion a roof and use indoor/outdoor grass-looking carpet for the bottom... And I could theme it for Thanksgiving... make an activity of it by asking the children to come up with things that we are thankful for in our homes, like electricity, running water, toilets, comfortable beds, good food or pets. I could label each "room" of the bulletin board with those things. Or maybe I could focus the theme on safety and could show how to keep each room safe — no toys on the stairs, carbon monoxide and smoke detectors, candles in safe places, harmful chemicals locked away...
I might head to the cake-making aisle and find lots of ideas for a birthday bulletin board. The big number candles might look great if I make an individual cupcake for each child. And the cupcakes would be really eye-catching if instead of just running off a copy of a cute pattern, I use a metallic looking paper and fold it (like you would a fan) to make cupcake liners. - Don't buy it -- make it. Even if I don't buy those items, they can give me rich ideas. The tiny numbered candles might not be practical for my bulletin board, depending on size. And teachers are notoriously short on cash (I know I always am!) So I might make something that looks just like them instead with materials that I already have.
- Look to nature for ideas. It's all too easy to slap up that paper border with the fall leaves on it, but why not use real leaves for a fall border? Take the kids on a walk or out on the playground if you have good trees and have them collect the leaves for the border. You can use sticks, bark, dried flowers or straw. If you have that irritating kudzu covering trees and bushes, you would be amazed at how great this stuff is for making woven borders and backgrounds. You can make baskets out of the stuff, even.
- Involve the kids. The best bulletin boards are those that are interactive or are populated with work that came from the hands of your students. Like the above example of the potatoes, be open to expanding your daily activities into a display. It's good for parents to see what the children have been doing and it's fun for the kids to look at the board and remember the fun and learning they experienced with that activity.
Sunday, November 6, 2005
Fourth Annual Homeschooling’s Best Contest
Calvert School, the nation’s first formal home-school curriculum provider, is seeking nominees for its fourth annual Homeschooling’s Best Awards, which recognize people whose efforts have improved home-schooling during the year.
“Each year countless people from all over the country and the world play a critical role – whether big or small – in making home-schooling a better alternative for children’s education,” said Jean C. Halle, president of Calvert Education Services, the home-school curriculum provider affiliated with the prestigious Calvert School in Baltimore, Md.
“As home-schooling’s first,” added Halle, “we feel it is important to recognize people who are truly home-schooling’s best.”
Since its inception in 2002, the Homeschooling’s Best Awards have honored recipients for establishing innovative home-schooling programs in their communities, promoting home-schooling through media coverage, expanding the opportunities available to home-schooling families and assisting home-schoolers to obtain curriculum materials.
Recipients have come from all over the United States, including California, Maryland, New York, Texas, and Virginia. More than 50 nominations were submitted in 2004, the award’s third year.
Nominations can be submitted at Calvert School’s website, www.calvertschool.org/best. The deadline for nominations is Friday, Dec. 2, and recipients will be named in December.
* * *
About Calvert School
Since 1906, Calvert School, a not-for-profit organization, has been providing students from pre-kindergarten through eighth grade with a complete, integrated, and accredited curriculum that leaves no gaps in instruction. Calvert’s detailed, step-by-step lessons are based on Calvert School’s classroom instruction. The time-tested Calvert program inspires children to reach their full academic potential and helps parents be effective home teachers. In addition to the Calvert homeschooling program, Calvert’s lessons have been employed successfully in classroom settings throughout the world for more than 60 years. In its first century, more than 500,000 students have been educated with the Calvert School program.
To learn more, visit Calvert’s web site at www.calvertschool.org.
Friday, November 4, 2005
Thieves Target Parents at Child Care Centers
Here's a story about some robbers who know opportunity when they see it. They target busy parents and it only takes a minute for it to happen.
If you work in a child care center or have a family child care setting, you've probably seen it a million times. Parents come to drop off or pick up their kids and, expecting to be inside for just a moment, they leave the keys in the car, sometimes with the car still running.
It happens, too, when parents of babies or multiple children have backpacks, diaper bags, show-and-tell items, car seats or baby carriers, bags of diapers... It's a lot to deal with in a busy parking lot when they're possibly already late for work.
I know some centers have morning and afternoon staff that are dedicated to helping parents get in and out at these times, and wouldn't we all be so lucky if we could afford to staff our facilities like this? A possibility might be to instruct staff, if the ratios are right and there are extra hands around, to help out in this way.
The more realistic option would be to print the above article out and distribute it to parents with your monthly or weekly newsletter with some guidelines on how to avoid this. Maybe hold a parent education night and invite your police officers to talk about this danger.
You might think your center is in a low-crime area or that you're not at risk for this, but that's exactly what criminals are hoping. This type of theft happens more often than you'd think.
Thursday, November 3, 2005
Babysitting Deaths Being Investigated
Stories like this just emphasize the need for background and reference checks and certification for babysitters. I'm not talking about a degree here, I'm talking about a basic course in first aid and child care -- how to handle a crying baby, how to handle a biting toddler, etc. I believe that babysitters who take a course like this are not only more educated and skilled caregivers, but they also show a committment to what they do by taking the initiative to learn more.
If you engage in babysitting, I urge you to complete a course like those offered by the American Red Cross. In addition, keep handy a list of references for parents who may be utilizing your services. You can help "raise the bar" for babysitters and teach parents to expect more when it comes to choosing caregivers for their children.
If you engage in babysitting, I urge you to complete a course like those offered by the American Red Cross. In addition, keep handy a list of references for parents who may be utilizing your services. You can help "raise the bar" for babysitters and teach parents to expect more when it comes to choosing caregivers for their children.
Dental Tips for the Days After Halloween and Beyond
Although Halloween may be over for another year, the experts at United Concordia Dental Insurance advise parents that the consequences of too many sweets may still haunt their children's teeth if proper dental hygiene and oral health practices are not followed. "The days following Halloween, when children continue to eat all the candy they collected while trick-or-treating, provide a great opportunity for parents to discuss the importance of dental health with their children," said United Concordia's National Dental Director Larry McKinley, DDS. "There's no better time than following a candy and sugar-filled holiday for parents to remind their children about proper brushing and flossing of their teeth. At the same time, they'll be helping their children establish effective dental hygiene practices that can be used throughout their lives." The following tips from United Concordia can help parents teach their children the basics of good oral health:
- During visits to the dentist, ask about age-appropriate ways to teach
children about preventive dental health
- Teach children about the importance of brushing after eating, since
food left in the mouth turns to acid that can cause tooth decay
- Pack a toothbrush with a child's lunch to remind kids that an after
mealtime brushing is a healthy habit
- Take children shopping and turn purchasing a toothbrush and floss into
a fun activity
- Instead of sugary treats, give children stickers, sugarless gum,
colorful toothbrushes, flavored toothpaste and bookmarks or other
positive reinforcement "gifts"
- Finally, teach children to eat a balanced diet rich with vegetables.
Don't make sugary treats off limits, but practice a routine of
moderation that child will learn, understand and follow for years to
come.
For help in teaching children good dental hygiene practices, United Concordia has developed a new child-friendly dental health section on its Web site. Visit the site at www.ucci.com and click on "Diversity at United Concordia" to find the "Children's Fun Pages" link. The new section includes the Plaque Attack concentration game, word searches, crossword puzzles, connect-the-dots pictures and more.
About United Concordia
United Concordia Companies Inc., a Highmark Inc. subsidiary headquartered in Harrisburg, PA, is one of the nation's largest group dental insurers with more than 6.5 million members worldwide. In 2004, United Concordia processed more than 11 million claims. For more information about United Concordia, visit www.unitedconcordia.com.
Source: United Concordia
Wednesday, November 2, 2005
Make a Turkey Book that Teaches Colors
This idea is based on the Brown Bear, Brown Bear book.
First you will need a turkey template to cut out and color. Here are a few nice ones:
Large Turkey
Turkey Coloring Page
Realistic Turkey (for those of you that dislike the cartoony looking line art, but keep in mind you'll be coloring them with bright colors)
I used a pattern that came out of a book, but you can freehand one if you're a good artist. I'm not. :)
You should think about what size your book will be before printing. You can make it two pages per sheet of paper and fold it or make a big book with one page per sheet. You may need to shrink your template on the copy machine or on your computer before printing.
What I did was use 2 sheets per page. I printed and colored my turkeys and hand lettered the book with, "BLUE turkey, BLUE turkey, what do you see?" (You have to start the book with the question, then the page following can have the answer, "I see a RED turkey looking at me." And then you have a "turkey" page saying, "RED turkey, RED turkey, what do you see?" And then on the next page, "I see a GREEN turkey looking at me." and then on the next page, "GREEN turkey, GREEN turkey, what do you see?" Continue until you've exhausted all your "color" options.
I mounted the pages on construction paper that was slightly larger and then covered with contact paper. Then I punched three holes along the side and held it all together with yarn.
If you are doing this book for toddlers, then you can stick to basic colors like blue, red, green, yellow... and keep the book short.
If you are doing it for older children, they will probably still enjoy the story, since it's a familiar favorite... but you can use more "advanced" colors such as lavender, fuschia, turquoise, etc.
I put the color names in all caps matching the color to help aid with sight recognition as well, which is good even for toddlers. You may not think they're getting it, but I've seen many children in my care recognize the word by sight somewhere else, long after we were done reading the book.
Here are some images:

Click to enlarge image of pages being glued to construction paper

Click to enlarge image of RED turkey pages

Click to enlarge image of GREEN turkey pages
First you will need a turkey template to cut out and color. Here are a few nice ones:
Large Turkey
Turkey Coloring Page
Realistic Turkey (for those of you that dislike the cartoony looking line art, but keep in mind you'll be coloring them with bright colors)
I used a pattern that came out of a book, but you can freehand one if you're a good artist. I'm not. :)
You should think about what size your book will be before printing. You can make it two pages per sheet of paper and fold it or make a big book with one page per sheet. You may need to shrink your template on the copy machine or on your computer before printing.
What I did was use 2 sheets per page. I printed and colored my turkeys and hand lettered the book with, "BLUE turkey, BLUE turkey, what do you see?" (You have to start the book with the question, then the page following can have the answer, "I see a RED turkey looking at me." And then you have a "turkey" page saying, "RED turkey, RED turkey, what do you see?" And then on the next page, "I see a GREEN turkey looking at me." and then on the next page, "GREEN turkey, GREEN turkey, what do you see?" Continue until you've exhausted all your "color" options.
I mounted the pages on construction paper that was slightly larger and then covered with contact paper. Then I punched three holes along the side and held it all together with yarn.
If you are doing this book for toddlers, then you can stick to basic colors like blue, red, green, yellow... and keep the book short.
If you are doing it for older children, they will probably still enjoy the story, since it's a familiar favorite... but you can use more "advanced" colors such as lavender, fuschia, turquoise, etc.
I put the color names in all caps matching the color to help aid with sight recognition as well, which is good even for toddlers. You may not think they're getting it, but I've seen many children in my care recognize the word by sight somewhere else, long after we were done reading the book.
Here are some images:
Click to enlarge image of pages being glued to construction paper
Click to enlarge image of RED turkey pages
Click to enlarge image of GREEN turkey pages
Infant Daily Sheet
Here is an infant daily sheet you can use in your family child care or center setting. This was designed for infants that are already eating table foods or solids, taking fewer bottles and are taking two naps daily, so if you are caring for very young babies, you may want to change the sheet a bit. You can see below what information is contained in the report.
You can view this as a .pdf document for printing as is, or you can access the Microsoft Word file and edit it to suit your setting.
Infant Daily Report
Name:__________________________________________________
Date:___________________ Theme:_______________________
Today I was: Diapers:
Lots of Smiles Wet:_____________
Content BM's:____________
Teary-eyed
Fluids
Time: ___________ oz: ___________
Time: ___________ oz: ___________
Time: ___________ oz: ___________
Today I played in the following ways:_____________
__________________________________________________
__________________________________________________
This is how I ate today:
Breakfast:___________________________________
Lunch: ______________________________________
Snack(s): ___________________________________
Naps: ______________________________________
____________to______________
____________to______________
My caregiver wants to tell you this:_____________
_________________________________________________
_________________________________________________
_________________________________________________
Toddler Daily Sheet
Here is a toddler daily sheet you can use in your family child care or center setting. The "play" reflects the toddler toys I have available on a daily basis, so your toys are probably different. You can see below what information is contained in the report.
You can view this as a .pdf document for printing as is, or you can access the Microsoft Word file and edit it to suit your setting. I added clip-art to mine as you can see here:

Name_____________________________________________________________
Date____________________ Theme__________________________________
Today I ate: None Some Most All
Breakfast _____ _____ _____ _____
Lunch _____ _____ _____ _____
Snack _____ _____ _____ _____
Bottles: ________ a.m. ________ p.m.
Today I played in the following ways:
Musical Toys Dress-Up Busy Boxes Puzzle Book Dishes Puzzles Play-Food Shopping Cart Yellow Push Car Housekeeping Toys Pillows Blocks Bricks Books Flannel Board Balls Snap Beads Shape Sorter Duplos Talking Driver Trucks Cars Tools Workshop Stacking Rings See-n-Say Dolls Puppets Stuffed Animals Gazoobo Playdough Lacing-Toys Waffle Blocks Color Paddles Farm Animals Weeble People School Bus Circus Train Lincoln Logs Color Forms Cash Register Sesame Street Figures Snap Rings Jewelry Folder Games Crayons Markers Sand Play Water Play Shaving Cream Chalk Paint
Other Activities_____________________________________________________
_____________________________________________________________________
Today My Mood was:
Cheerful Sociable Clingy Cooperative Testing Content Tired Tearful Quiet Vocal Frustrated Energetic
And my touches to my friends were ____________________________________
Songs & Stories:______________________________________________________
Diapers: ___________Wet ____________BM's __________Ointment Used
I Took a Nap Today From _____________ to _____________
Comments & Reminders:_______________________________________________________
You can view this as a .pdf document for printing as is, or you can access the Microsoft Word file and edit it to suit your setting. I added clip-art to mine as you can see here:
Name_____________________________________________________________
Date____________________ Theme__________________________________
Today I ate: None Some Most All
Breakfast _____ _____ _____ _____
Lunch _____ _____ _____ _____
Snack _____ _____ _____ _____
Bottles: ________ a.m. ________ p.m.
Today I played in the following ways:
Musical Toys Dress-Up Busy Boxes Puzzle Book Dishes Puzzles Play-Food Shopping Cart Yellow Push Car Housekeeping Toys Pillows Blocks Bricks Books Flannel Board Balls Snap Beads Shape Sorter Duplos Talking Driver Trucks Cars Tools Workshop Stacking Rings See-n-Say Dolls Puppets Stuffed Animals Gazoobo Playdough Lacing-Toys Waffle Blocks Color Paddles Farm Animals Weeble People School Bus Circus Train Lincoln Logs Color Forms Cash Register Sesame Street Figures Snap Rings Jewelry Folder Games Crayons Markers Sand Play Water Play Shaving Cream Chalk Paint
Other Activities_____________________________________________________
_____________________________________________________________________
Today My Mood was:
Cheerful Sociable Clingy Cooperative Testing Content Tired Tearful Quiet Vocal Frustrated Energetic
And my touches to my friends were ____________________________________
Songs & Stories:______________________________________________________
Diapers: ___________Wet ____________BM's __________Ointment Used
I Took a Nap Today From _____________ to _____________
Comments & Reminders:_______________________________________________________
Tuesday, November 1, 2005
Soap Crayons
Ice cube tray
liquid food coloring for each color crayon
2 T hot water
1 cup soap flakes
For each color, put two tablespoons of hot water and one cup of soap flakes into a bowl. Add as many drops of food coloring to the mix as you wish. Stir the soap mixture until it thickens. This takes time, so be patient. Press spoonfuls of the first color of soap into sections of the ice tray. Mix enough soap in other colors to fill the entire tray, repeating the first two steps. Let the soap crayons dry for one or two days. Gently bang the ice tray to loosen the crayons.
Homemade Soap Balls
Ivory Snow
water
bowl
plastic trays
food coloring optional
fragrance optional (like perfume or cologne)
Moisten Ivory Snow with water in a bowl to the consistency of very stiff dough. Food coloring and fragrance may be added if desired. Have each child shape large spoonfuls of soap into balls with their hands. Place shaped balls on plastic trays to harden- about 3 days.
Slate Bag
Tempera Paint
Ziplock bag
Place paint in bag and smooth out bubbles. Make sure the bag is locked completely. Thick paint such as fingerpaint works best. Allow children to press the bag with their fingers to make designs.
Ziplock bag
Place paint in bag and smooth out bubbles. Make sure the bag is locked completely. Thick paint such as fingerpaint works best. Allow children to press the bag with their fingers to make designs.
Mud Pies
1 puddle
Plastic sandpails
Spoons
Cookie sheet
The "original" clay- dirt and water! Dig mud out of bottom of puddle and mix in sandpails. Spoon globs onto cookie sheets. Remove worms. Place in the sunshine until mudpies dry.
Plastic sandpails
Spoons
Cookie sheet
The "original" clay- dirt and water! Dig mud out of bottom of puddle and mix in sandpails. Spoon globs onto cookie sheets. Remove worms. Place in the sunshine until mudpies dry.
Cornstarch Clay
1 cup cornstarch
1/3 cup vegetable oil
2/3 cup flour
Pour cornstarch into a bowl and add oil. Stir until syrupy. Gradually add the flour until thick and doughy. Knead well and store in airtight container.
1/3 cup vegetable oil
2/3 cup flour
Pour cornstarch into a bowl and add oil. Stir until syrupy. Gradually add the flour until thick and doughy. Knead well and store in airtight container.
Salty Playdough
1 cup salt
4 cups flour
1 1/2 cups water
4 T oil
Mix flour and salt. Add water and oil slowly to the dry ingredients, stirring with a spoon until well blended. Knead dough until soft and pliable. Sculpt objects or use cookie cutters. Bake 45 minutes in 350 degree F oven until hard. Paint with acrylic or varnish to seal.
You “Knead” This Dough
2 1/2 cup flour
1/2 cup salt
1 T alum
1 3/4 cup boiling water
2 T vegetable oil
food coloring if desired
Mix flour and salt in a bowl. Mix alum, water, oil and food coloring in a separate bowl; add to flour mixture. Knead well. Add more flour if sticky. Keep in airtight container.
1/2 cup salt
1 T alum
1 3/4 cup boiling water
2 T vegetable oil
food coloring if desired
Mix flour and salt in a bowl. Mix alum, water, oil and food coloring in a separate bowl; add to flour mixture. Knead well. Add more flour if sticky. Keep in airtight container.
Cooked Homemade Fingerpaint
4 cups cold water
6 teaspoons of cornstarch
Mix a small amount of cold water with cornstarch until smooth. Gradually add the remainder of the water. Cook the mixture over low heat until it is clear and the consistency of pudding. Add tempera for color.
6 teaspoons of cornstarch
Mix a small amount of cold water with cornstarch until smooth. Gradually add the remainder of the water. Cook the mixture over low heat until it is clear and the consistency of pudding. Add tempera for color.
Fancy Bubbles
1 cup water
2 T liquid detergent
1 T glycerine
1 tsp sugar
Mix all ingredients together until sugar dissolves.
2 T liquid detergent
1 T glycerine
1 tsp sugar
Mix all ingredients together until sugar dissolves.
Colored Bubbles
1 cup granulated soap or soap powder
1 quart warm water
liquid food coloring
plastic straws
small juice cans
Dissolve soap in warm water, stir in food coloring. Give each child a can about 1/3 full of mix and a plastic straw to blow the bubbles.
1 quart warm water
liquid food coloring
plastic straws
small juice cans
Dissolve soap in warm water, stir in food coloring. Give each child a can about 1/3 full of mix and a plastic straw to blow the bubbles.
Squeeze Bottle Glitter
1 part flour
1 part salt
1 part water
Mix equal parts of flour, salt and water. Pour into plastic squeeze bottles, such as those used for ketchup and mustard. Add liquid coloring for variety. Squeeze onto heavy construction paper or cardboard. The salt gives the designs a glistening quality when dry.
1 part salt
1 part water
Mix equal parts of flour, salt and water. Pour into plastic squeeze bottles, such as those used for ketchup and mustard. Add liquid coloring for variety. Squeeze onto heavy construction paper or cardboard. The salt gives the designs a glistening quality when dry.
Classroom Paste
1 cup nonself-rising wheat flour
1 cup sugar
1 cup cold water
4 cups boiling water
1 T alum
1/2 tsp oil of wintergreen
Mix flour and sugar in saucepan. Gradually stir in cold water to make a paste. Slowly stir in boiling water. Bring to a boil and stir until mixture is thick and clear. Remove from heat and mix in alum and oil of wintergreen. Makes about 1 1/2 quarts.
Paper Paste Number Two
1/3 cup nonself-rising wheat flour
2 T sugar
1 cup water
1/4 tsp oil of peppermint or wintergreen
Mix flour and sugar in saucepan. Gradually stir in water and cook over low heat until mix is clear. Remove from heat and mix in oil of peppermint or wintergreen. Make about 1 cup.
2 T sugar
1 cup water
1/4 tsp oil of peppermint or wintergreen
Mix flour and sugar in saucepan. Gradually stir in water and cook over low heat until mix is clear. Remove from heat and mix in oil of peppermint or wintergreen. Make about 1 cup.
Thin Paste Number Two
1/4 cup sugar
1/4 cup nonself-rising wheat flour
1/2 tsp alum
1 3/4 cups water
1/4 tsp oil of wintergreen
Combine sugar, flour and alum in saucepan. Gradually stir in 1 cup water. Bring to boil and stir until mix is clear and smooth. Stir in 3/4 cup water and oil of wintergreen. Makes 1 pint.
1/4 cup nonself-rising wheat flour
1/2 tsp alum
1 3/4 cups water
1/4 tsp oil of wintergreen
Combine sugar, flour and alum in saucepan. Gradually stir in 1 cup water. Bring to boil and stir until mix is clear and smooth. Stir in 3/4 cup water and oil of wintergreen. Makes 1 pint.
Colored Salt Paste
2 parts salt
1 part flour
powdered paint
water
Mix salt and flour. Add powdered paint. Gradually stir in enough water to make a smooth, heavy paste. This mix can be used like regular paste. Store in airtight container.
1 part flour
powdered paint
water
Mix salt and flour. Add powdered paint. Gradually stir in enough water to make a smooth, heavy paste. This mix can be used like regular paste. Store in airtight container.
Sand and Cornstarch Modeling Dough
3 cups sand
1 1/2 cups cornstarch
3 tsp alum
2 1/4 cups hot water
food coloring
Mix sand, cornstarch, and alum in saucepan. Add hot water and food coloring. Cook over med. heat until mix thickens. Remove from heat and knead until smooth. Store in air tight container.
1 1/2 cups cornstarch
3 tsp alum
2 1/4 cups hot water
food coloring
Mix sand, cornstarch, and alum in saucepan. Add hot water and food coloring. Cook over med. heat until mix thickens. Remove from heat and knead until smooth. Store in air tight container.
Finger Paint Number Seven
1 cup flour
1 cup cold water
3 cups boiling water
powdered tempera or food coloring
Mix the flour and water, stirring until smooth. When mix is smooth, pour it gradually into the boiling water and bring to a boil, stirring constantly. Add the coloring.
1 cup cold water
3 cups boiling water
powdered tempera or food coloring
Mix the flour and water, stirring until smooth. When mix is smooth, pour it gradually into the boiling water and bring to a boil, stirring constantly. Add the coloring.
Finger Paint Number Six
1 T soap powder
1/4 cup liquid starch
1/3-1/2 cup water
1 one pound can powdered paint
Pour soap powder, starch, and water into blender. Gradually add powdered paint while machine is running. Blend until smooth. Use this recipe for extremely bright colors.
1/4 cup liquid starch
1/3-1/2 cup water
1 one pound can powdered paint
Pour soap powder, starch, and water into blender. Gradually add powdered paint while machine is running. Blend until smooth. Use this recipe for extremely bright colors.
Finger Paint Number Five
1 part liquid soap (NOT detergent)
4 parts liquid starch
powdered tempera
Add soap to liquid starch and let children use this mix on a smooth washable surface. Sprinkle tempera on the liquid to provide color.
4 parts liquid starch
powdered tempera
Add soap to liquid starch and let children use this mix on a smooth washable surface. Sprinkle tempera on the liquid to provide color.
Finger Paint Number Four
1 cup dry laundry starch
1 cup cold water
3 cups soap flakes
Mix all ingredients together for a quick, no-cook fingerpaint. The texture will not be as smooth and thick as the cooked kind.
1 cup cold water
3 cups soap flakes
Mix all ingredients together for a quick, no-cook fingerpaint. The texture will not be as smooth and thick as the cooked kind.
Finger Paint Number Three
1 cup dry laundry starch
1/2 cup cold water
1 1/2 cups boiling water
3/4 cup powdered detergent
Put the dry starch in saucepan. Gradually add the cold water, stirring until smooth. Add the boiling water, stirring rapidly and continually. Add the detergent and stir again until smooth. There is no need to cook this recipe.
1/2 cup cold water
1 1/2 cups boiling water
3/4 cup powdered detergent
Put the dry starch in saucepan. Gradually add the cold water, stirring until smooth. Add the boiling water, stirring rapidly and continually. Add the detergent and stir again until smooth. There is no need to cook this recipe.
Finger Paint Number Two
1 cup cornstarch
2 cups cold water
1/2 cup soap powder
2 quarts boiling water
glycerine or oil of wintergreen
liquid food coloring
Put 1 cup cornstarch in pitcher or bowl. Gradually add 2 cups cold water, stirring until smooth. Pour this mixture slowly into two quarts of boiling water, stirring constantly. Cook until the mixture is clear and thick. Add the soap powder. Stir until smooth. Remove from heat and add a few drops of glycerine or wintergreen and food coloring.
Finger Paint Number One
1 cup dry laundry starch or 1 cup cornstarch
1 cup cold water
4 cups boiling water
1 cup soap flakes
1/4 cup talcum powder
Put the starch in a large saucepan. Add the cold water gradually, stirring until there are no lumps. Continue to stir while adding the boiling water, and cook over medium heat until clear, stirring constantly. When mix thickens, add the soap flakes and talcum powder. Remove from heat and beat with an egg beater until smooth. Mixture should be thick. Store in a plastic container in refrigerator or use while still warm.
Easel Paint Number Three
1/3 cup water
1/4 cup liquid starch
1 one pound can powdered paint
1 T soap powder
Pour liquids into blender. Gradually blend in the powdered paint, using a rubber spatula to scrape the paint down from the sides of the blender jar. Add soap powder, and blend. Paint should be very smooth and thick. Add more liquid if necessary.
Easel Paint Number Two
1 part powdered paint
2 parts powdered detergent
2 parts water
Mix powdered paint and powdered detergent together. Slowly mix in two parts water, stirring to eliminate any lumps. This basic recipe can be used to mix either large or small amounts as long as you keep the proper proportions.
2 parts powdered detergent
2 parts water
Mix powdered paint and powdered detergent together. Slowly mix in two parts water, stirring to eliminate any lumps. This basic recipe can be used to mix either large or small amounts as long as you keep the proper proportions.
Easel Paint Number One
6-8 T extender
1 one- pound can of powdered paint
3 cups liquid starch
2 T soap flakes
water
Put the extender in a large container, such as a one-quart plastic juice container. Gradually stir in the powdered paint and liquid starch, mixing well. Add soap powder. Add water until mixture reaches desired consistency.
This recipe makes a large enough quantity so that it can be stored and poured out into small juice cans each day as needed. The paint will thicken and will need stirring and possibly more water.
Bentonite Extender
2 cups bentonite (powdered can be purchased at most ceramic supply stores and some hardware stores, even)
2 quarts water
1/2 cup soap powder
Gradually add water to bentonite and mix well with beater. (A blender is preferred. If it is used start by filling the container half full of water and add bentonite gradually. Turn blender off for a few seconds to check the consistency. Let mixture stand in a crock or plastic container for two to three days- stirring well each day. DO NOT use a METAL container.
Helpful Hints:
1. An extender, like bentonite reduces paint cost and gives the desired consistency. Also can be added to tempera to make fingerpaint.
2. Soap makes paint easier to wash out and helps it adhere to slick surfaces like glass and celophane.
3. Detergent keeps paint from cracking when the paint dries.
4. Alum is a preservative. Glycerine and oil of wintergreen (or clove) keep paint mixtures fresh.
5. Condensed milk gives paint a glossy finish.
Playdough for Baking
Use for making nearly unbreakable miniature tree ornaments and figures.
Blend in a bowl:
3/4 cup flour
1/4 cup white glue
1/4 cup ivory liquid SHAMPOO
food coloring
Knead the mixture together thoroughly, dusting with flour. Roll dough out flat. Make it thin because it expands when baked. Cut the dough with small cookie cutters. If you wish to hang the cutouts, poke a hole through the top. Bake on a cookie sheet for 2 hours at 200 degrees F. When cool, decorate with acrylic or tempera paint.
Sand Paint Number Two
1/2 cup sand
1 T Powdered paint
Mix and Shake onto surface brushed with watered glue.
1 T Powdered paint
Mix and Shake onto surface brushed with watered glue.
Paint like Snow
2/3 cup dry starch or cornstarch
1 cup cold water
3 cups boiling water
1 T glycerine
1 cup ivory soap flakes or 2 T liquid soap
calcimine pigment or food coloring
Dissolve starch in cold water. Smooth lumps and add boiling water. Stir constantly. Thicken until clear but do not boil more than one minute. Add rest of ingredients (hot or cold). Use on glazed paper, newsprint, wrapping paper, or on washable surface for monoprints.
To 1 cup of the above fingerpaint mixture add:
1 T white tempera paint or 1 1/2 cups soap powder or flakes
1 cup hot or warm water
1 tsp glycerine
Whip with an egg beater
Finger Paint
2/3 cup dry starch or cornstarch
1 cup cold water
3 cups boiling water
1 T glycerine
1 cup ivory soap flakes or 2 T liquid soap
calcimine pigment or food coloring
Dissolve starch in cold water. Smooth lumps and add boiling water. Stir constantly. Thicken until clear but do not boil more than one minute. Add rest of ingredients (hot or cold). Use on glazed paper, newsprint, wrapping paper, or on washable surface for monoprints.
Glycerin Bubbles
1 cup of water
2 tablespoon liquid detergent
1 tablespoon glycerin
1/2 teaspoon granulated sugar
Mix all ingredients together and enjoy!
2 tablespoon liquid detergent
1 tablespoon glycerin
1/2 teaspoon granulated sugar
Mix all ingredients together and enjoy!
Salt Paint Number Two
1/3 cup salt
1/4 tsp food coloring
spread in pan to dry before putting in shakers
1/4 tsp food coloring
spread in pan to dry before putting in shakers
Sugar Flour Paste
1 cup flour
1 cup sugar
1 quart water (2 cups cold, 2 cups hot)
1 T powdered alum
3 drops oil of cloves
Mix flour and sugar together. Slowly stir in 1 cup of water. Bring remaining water to a boil and add the mixture to it, stirring constantly. Continue to cook and stir (1/2 hour in a double boiler) until fairly clear. Remove from heat and add oil of cloves. Makes 1 quart of paste. Paste keeps a long time. Keep moist by adding small piece of wet sponge to top of small jar of paste.
Kool-Aid Playdough Number Two
2 1/2 to 3 cups flour
2 cups boiling water with 1 pkg. kool-aid (any flavor)
3 T corn oil
1/2 cup salt
1 T alum
Mix ingredients and knead with flour (may take up to 1 cup). Use more if the dough draws moisture in high humidity. Keeps well, nice fragrance, very colorful and very flexible.
2 cups boiling water with 1 pkg. kool-aid (any flavor)
3 T corn oil
1/2 cup salt
1 T alum
Mix ingredients and knead with flour (may take up to 1 cup). Use more if the dough draws moisture in high humidity. Keeps well, nice fragrance, very colorful and very flexible.
Durable Playdough
Mix together in a heavy saucepan:
1 cup of flour
1/2 cup cream of tartar
Add 1 cup of water and 2 T cooking oil
Stir while cooking over medium heat until it sticks together in a ball and looks like stiff mashed potatoes, 3-5 min. Dump onto a plate to cool a few minutes and then knead into the clay about 1 or 2 cups of flour. Store in a plastic bag (no need to refrigerate).
Bookbinder’s Paste
2 T flour
1/4 cup cornstarch
1-2 tsp powdered alum
2 cups water
Mix dry ingredients. Add water slowly, stirring out lumps. Cook in a double broiler over low heat, stirring constantly. Remove from heat when paste begins to thicken; it will thicken more as it cools. Keep covered and thin with water when necessary.
Potter’s Clay
1/2 cup flour
1/2 cup cornstarch
1 cup salt dissolved in 3 3/4 cup boiling water
Blend flour and cornstarch with enough water to make a paste. Boil water and salt. Add to cornstarch mix and cook until clear. Cool overnight, and then add 6 to 8 cups of flour and knead until you have the right consistency. Note: Keep a metal salt shaker full of flour handy for the children to keep their clay from sticking.
Nonhardening, No-Cook Playdough
3 cups flour
3 T alum
1/2 cup salt
2 T cooking oil
2 cups boiling water
Add 10 drops food coloring to liquid or 2-3 T dry tempera to flour. Adjust color intensity as desired. Mix in order given. Can use a dough mixer, mixmaster, or stir with a spoon. Knead well. Kepps up to 6 mos. in heavy plastic loc bag.
3 T alum
1/2 cup salt
2 T cooking oil
2 cups boiling water
Add 10 drops food coloring to liquid or 2-3 T dry tempera to flour. Adjust color intensity as desired. Mix in order given. Can use a dough mixer, mixmaster, or stir with a spoon. Knead well. Kepps up to 6 mos. in heavy plastic loc bag.
Sidewalk Chalk Number Two
2 C. Water
2 C. Plaster of Paris
2 T Tempera Paint
Toilet Paper Tubes
Duct Tape
Seal one end of each toilet paper tube with duct tape.
Mix all ingredients and let stand for 5 minutes. Line a cookie sheet with wax paper, and place tubes upright on paper with open end facing up. Pour mixture into holders. Allow to stand until almost firm. Remove holders and dry approximately 2 more hours, depending on humidity.
Gluedough
1. Blend Together:
2 cups white liquid glue (weldwood or bondfast)
2.5 cups of water
2. Dissolve 1TBSP of Borax powder in 1/3 cup of water and add to the above.
3. Blend together with your hands (messy but fun)
4. Dissolve another TBSP of Borax in 1/3 cup of water and add again. (even more fun as it's getting thicker)
5. Blend together with hands.
6. You can probably vary the consistency of dough by using more or less Borax. I haven't experimented yet.
Making this is a lot of fun as the consistency of the playdough is kind of like oozey-slime. It's not suitable for rolling and cut- ting. Nor is it edible. Store in an airtight container. It doesn't have to be refrigerated. It bubbles a lot like fermenting yeast which also "adds" to the experience.
Peanut Butter Playdoughs
Recipe One
Materials:
1 cup peanut butter,
1 cup liquid honey,
1 cup powdered milk,
1 cup rolled oats.
Mix together and use.
Recipe Two
Materials:
1 cup peanut butter,
1 cup white corn syrup,
1 cup
powdered sugar,
3 cups powdered milk
In a large bowl, mix peanut butter, corn syrup, and powdered sugar together. Add powdered milk and knead until smooth. (Add more powdered milk if you need to.) The children can mold dough into any shape they wish.
Additions: provide children with various decorating materials, (raisins, chocolate chips, raspberry chips, butterscotch chips, shredded coconut, dried fruit, pretzels, smarties etc.)
This is FOOD and children must wash their hands before touching the dough and only tough the dough on their plates.
(Recipe #1 is a little bit more grainy than #2 because of the oats)
Materials:
1 cup peanut butter,
1 cup liquid honey,
1 cup powdered milk,
1 cup rolled oats.
Mix together and use.
Recipe Two
Materials:
1 cup peanut butter,
1 cup white corn syrup,
1 cup
powdered sugar,
3 cups powdered milk
In a large bowl, mix peanut butter, corn syrup, and powdered sugar together. Add powdered milk and knead until smooth. (Add more powdered milk if you need to.) The children can mold dough into any shape they wish.
Additions: provide children with various decorating materials, (raisins, chocolate chips, raspberry chips, butterscotch chips, shredded coconut, dried fruit, pretzels, smarties etc.)
This is FOOD and children must wash their hands before touching the dough and only tough the dough on their plates.
(Recipe #1 is a little bit more grainy than #2 because of the oats)
Silly Putty Number Two
Mix well:
2 parts White Glue (Elmer's)
1 part Sta-Flo Liquid Starch
If you use Elmer's School Gule instead of regular white it doesn't bounce or pick up pictures.
2 parts White Glue (Elmer's)
1 part Sta-Flo Liquid Starch
If you use Elmer's School Gule instead of regular white it doesn't bounce or pick up pictures.
Clown Paint
1/8 C. Baby Lotion
1/4 Teasp Powdered Tempera paint
1 Squirt liquid Dishwashing Soap
Easily removed by soap and water
1/4 Teasp Powdered Tempera paint
1 Squirt liquid Dishwashing Soap
Easily removed by soap and water
Eggshell Chalk
4-5 eggshells
1 teaspoon flour
1 teaspoon very hot tap water
food coloring (optional)
Wash & dry eggshells. Put into bowl and grind into a powder. A mortar and pestle works fine for this. Discard any large pieces. Place flour and hot water in another bowl and add 1 tablespoon eggshell powder & mix until a paste forms. Add food coloring if desired. Shape & press mixture firmly into the shape of a chalk stick, and roll up tightly in a strip of paper towel. Allow to dry approximately 3 days until hard. Remove paper towel & you've got chalk! Eggshell chalk is for sidewalks only.
Silly Putty
1/2 Cup Elmer's glue
1/2 Cup Starch --
liquid Food coloring
Do NOT substitute any other glue for Elmer's glue! Slowly add starch to glue and knead with fingers. The more you work with it the better it jells. Add food coloring if you want.
1/2 Cup Starch --
liquid Food coloring
Do NOT substitute any other glue for Elmer's glue! Slowly add starch to glue and knead with fingers. The more you work with it the better it jells. Add food coloring if you want.
Homemade Bath Salts
2 1/2 lb Epsom Salts
Food Coloring
Perfume
Combine Epsom salts with food coloring and perfume in a large bowl. Mix well so color is even. Put into smaller jars and let stand 4-6 weeks before using. This causes the odor to blend with the salts. This bath salt is very soothing and makes for a very relaxed bath.
Food Coloring
Perfume
Combine Epsom salts with food coloring and perfume in a large bowl. Mix well so color is even. Put into smaller jars and let stand 4-6 weeks before using. This causes the odor to blend with the salts. This bath salt is very soothing and makes for a very relaxed bath.
Paper Paste
1/3 cup non-self-rising wheat flour;
2 TBLS sugar;
1 cup water;
1/4 tsp oil of cinnamon
1. Mix flour and sugar in a saucepan. Gradually add water, stirring vigorously to break up lumps.
2. Cook over low heat until clear, stirring constantly.
3. Remove from stove and add oil of cinnamon. Stir until well blended. Makes about 1 cup.
Spread paste with a brush or tongue depressor. Soft, smooth, thick and white, Paper Paste has a good spreading consistency and is especially appropriate for use with small children or for any paste-up work. This paste can be stored in a covered jar for several weeks without refrigeration.
Thin Paste
1/4 cup sugar;
1/4 cup non-self-rising flour;
1/2 teaspoon powdered alum
1-3/4 cups water;
1/4 teaspoon oil of cinnamon
1. In a medium-sized pan, mix together sugar, flour and alum.
2. Gradually add 1 cup water, stirring vigorously to break up lumps.
3. Boil until clear and smooth stirring constantly.
4. Add remaining water and oil of cinnamon. Stir until thoroughly mixed.
Makes one pint. How to use it: Spread paste with a brush or tongue depressor. Thin Paste is an excellent adhesive for scrapbooks, collages, and Strip Papier-mâché'. This paste can be stored in a jar for several months without refrigeration.
Best Bubble Solution
1 c Water
2 tb Light Karo syrup OR 2 Tablespoons Glycerin
4 tb Dishwashing liquid
Mix together and have fun!
2 tb Light Karo syrup OR 2 Tablespoons Glycerin
4 tb Dishwashing liquid
Mix together and have fun!
Flubber
Solution A:
1 1/2 C. Warm Water
2 c. Elmers Glue
Food Coloring
Solution B:
4 tsp. Borax
1 1/3 C. Warm water
Mix solution A in one bowl, mix solution B in another bowl. Dissolve both well. Then just pour solution A into solution B, DO NOT MIX OR STIR! Just lift out flubber. I made this with my daughters class, and the teacher & children loved it! It's neater than "Gak" or "slime". And it also a safe chemical reaction for the kids to see. I used a glass bowl for solution B so the kids could see the flubber form in the bowl. It just becomes a big "cloud" of rubbery stuff. Store in baggies. If you half the recipe, you only need to half the solution A and it will work the same.
Goop
1 Part Liquid starch
2 Part Elmer's Glue
Food Coloring (opt.)
Mix and enjoy. It's supposed to be like slime.
2 Part Elmer's Glue
Food Coloring (opt.)
Mix and enjoy. It's supposed to be like slime.
Sawdust Modeling Compound
1 c Fine sawdust
Food coloring
Old newspaper
Shellac or Varnish
1 c Thin Paste or Paper Paste
1. If desired, dye sawdust with food coloring. Drain and spread on newspaper to dry before using.
2. Mix sawdust and paste to a thick doughlike consistency. Knead until thoroughly mixed. The amounts of paste may vary according to the kind of sawdust used. If the sawdust is coarse, more paste may be needed to obtain the proper consistency.
QUANTITY: Makes about 1 cup.
USES:
Model as with clay. Articles molded with this compound have a lovely woodgrain appearance.
TO USE:
Pieces of dough may be added to the basic piece by moistening and sticking them down. Within two to three days, the finished article will harden. To speed up drying bake in a 200-degree-F. oven for 1 to 2 hours, depending on the size of the article. To give the article a permanent finish, spray with shellac or varnish. They can also be sanded to give a smoother finish.
Flower Preservative with Borax
Fresh Flowers (roses, (pansies, violets, sweet (peas, chrysanthemums, zinnias, marigolds,daisies)
Florist's wire
Airtight container such as -a coffee can
Plastic bag
Borax
Wire or string
Soft brush
1. Pick flowers at the peak of their bloom.
2. Remove the stems. Make new stems with florist's wire. Run wire through the base of the flower and twist the two ends together.
3. Line the coffee can with the plastic bag.
4. Pour enough borax into the plastic bag to cover the bottom to a depth of 1 inch.
5. Place flower face down in the borax. Pour about 1 inch of borax over the top of the flower. Add more flowers and borax until the container is full.
6. Gather the top of the bag, squeezing out all the air inside it. Fasten shut with wire or string.
7. Place lid on can and set aside in a dry place for at least 4 weeks.
8. Remove flowers from borax and carefully brush away all borax with a soft brush.
USES:
Flowers preserved in this way make colorful "permanent" floral arrangements. Flowers picked at the peak of their bloom remain fresh looking indefinitely.
TO USE:
Using the wire stems, make an attractive flower arrangement as you would a fresh-flower bouquet.
Flower Preservative with Cornmeal
1 pt Powdered Borax
2 pt Cornmeal
Covered cardboard box (shoe or stationery box)
Fresh flowers
1. Thoroughly mix borax and cornmeal.
2. Cover the bottom of the box with 3/4 of an inch of this mixture.
3. Cut flower stems about 1 inch long. Lay the flowers face down in this mixture. Spread the petals and leaves so that they lie as flat as possible. Do not place flowers too close together.
4. Cover the flowers with 3/4 of an inch of the mixture.
5. Place the lid on the box and keep at room temperature for 3 to 4 weeks.
This is an excellent way to preserve corsages or flowers from someone special.
Try daisies, pansies, apple blossoms, asters, violets, and other flowers with this method. They will stay summer fresh indefinitely.
Coffee Dough
4 c Unsifted all-purpose four
1 c Salt
1/4 c Instant coffee
1 1/2 c Warm water
1. Dissolve the coffee in the warm water.
2. In another bowl, mix the flour and the salt.
3. Make a hole in this and add 1 cup of the coffee water into it.
4. Mix with a fork or hands until smooth.
5. Add more coffee water if needed: dough should be smooth and satiny, not sticky or crumbly.
Store in a plastic bag to prevent drying of the dough. Bake finished designs in a 300 degree oven for 1 hour or more (until hard). Add 2 coats of shellac to preserve.
Powdered Milk Paint Medium
1/2 c Powdered nonfat milk
1/2 c Water
Powdered Paint Pigments
1. Mix milk and water. Stir until milk is dissolved.
2. Combine only as much solution with powdered pigments as you intend to use in one sitting.
Makes about 3/4 cup. For a large group, combine any amount of powdered milk with an equal amount of water. This paint dries quickly to a glossy, opaque finish. It does not dust, chip, or come off on your hands the way poster paint does. Mix a small amount of the solution with powdered pigment in a palette pan. Work smooth with a brush. Use water to thin paint and to clean your brushes. Store this medium in a tightly capped jar in the refrigerator.
Dryer Lint Modeling Material
3 c Lint (from laundry dryers)
2 c Cold or warm water
2/3 c Non-self-rising wheat flour
3 drops oil of wintergreen
Old newspaper
Put lint and water in a large saucepan. Stir to dampen all parts of the lint. Add flour and stir thoroughly to prevent lumps. Add oil of wintergreen. Cook over low heat, stirring constantly, until mixture holds together and forms peaks. Pour out onto several thicknesses of newspaper to cool. Use as you would papier-mâché pulp or shaped over armatures (boxes, bottles, balloons, and so forth) or press into a mold. This material will dry in 3 to 5 days to a very hard, durable surface. When wet it has a feltlike consistency. It dries to smooth or rough, depending on how it is used. When pressed into a mold, a hard, smooth finish is obtained. Stored in an airtight container, it will keep for several days.
Soft Pulp Papier Mache
Paper Napkins, Cleansing Tissues or Toilet Tissue
Thin Paste or white glue
1. Crumple napkins or tissue and cover with paste.
2. Model to desired shape.
Use to add details such as noses, ears, eyebrows, and so forth to larger pieces.
NOTE: This mixture does NOT keep and must be used immediately.
Thin Paste or white glue
1. Crumple napkins or tissue and cover with paste.
2. Model to desired shape.
Use to add details such as noses, ears, eyebrows, and so forth to larger pieces.
NOTE: This mixture does NOT keep and must be used immediately.
Rainbow Stew
1/3 c. sugar
1 c. cornstarch
4 c. cold water
Cook until thick. put in bowls, add food coloring. Put in ziplock baggies. Let the kids play with it while it is in the bags for a neat sensory experience or use it to mix colors.
1 c. cornstarch
4 c. cold water
Cook until thick. put in bowls, add food coloring. Put in ziplock baggies. Let the kids play with it while it is in the bags for a neat sensory experience or use it to mix colors.
Quick and Easy Modeling Dough
3/4 c Flour (not self-rising)
1/2 c Salt
1 1/2 t Powdered alum
1 1/2 t Vegetable Oil
1/2 c Boiling Water
Food Coloring
1. Mix flour, salt, and alum in a mixing bowl.
2. Add vegetable oil and boiling water. Stir vigorously with a spoon until well blended. Dough should not stick to the sides of the bowl and should be cool enough to handle.
3. Add food coloring and knead into dough until color is well blended and the dough is the desired tint.
QUANTITY:
Makes about 1 cup. Double the recipe for large projects. For groups, mix several double recipes rather than one large amount.
USES:
The is an excellent play dough. It has a smooth texture, takes about 15 minutes to make, and dries to a hard finish overnight. You can you can make lovely dough flowers as well as animals and other figures with it.
STORAGE:
Store in a jar with a tight lid. Dough will keep several months without refrigeration.
Cinnamon Applesauce Hearts or Ornaments
1 lb jar sweetened applesauce
8 oz cinnamon
Drain 1# jar of SWEETENED applesauce overnight (you will be amazed at how much water seeps out!!) Add 8 ounces of cinnamon to this and mix together well. Pat into a ball, press hard to solidify and mix. Then pat out in 1 cup units onto wax paper, push to 1/4" thickness (although many of my girls did 1/2 " or so) and cut with cookie cutters. dry.
Soap Crayons
1 3/4 c Ivory Snow; (powder)
50 drops food coloring
1/4 c water
Mix water & soap flakes together. Add food coloring & put mixture into an ice cube tray. Allow to harden. Break or cut into pieces. Fun to write with on the tub when bathing & face & hands!!!
50 drops food coloring
1/4 c water
Mix water & soap flakes together. Add food coloring & put mixture into an ice cube tray. Allow to harden. Break or cut into pieces. Fun to write with on the tub when bathing & face & hands!!!
Big Bubbles
1 C. Warm Water
1/4 C. Blue Dishwashing Liquid
1 Tsp. Salt
Combine all ingredients. Mix well until salt dissolves.
1/4 C. Blue Dishwashing Liquid
1 Tsp. Salt
Combine all ingredients. Mix well until salt dissolves.
Sidewalk Chalk
2 C. Water
2 C. Plaster of Paris
2 Tbl Tempera Paint (Wet or Dry)
Toilet Paper Tubes with duct tape over one end
Combine and stir together. Let stand a few minutes. Place tubes on cookie sheet lined with foil or wax paper. Pour mixture into holders, let stand until semi-firm. Remove holders and let dry completely - ready to use in about 1 to 1 1/2 hrs. (reminder, never pour plaster down sink)
Kool-Aid Playdough
2 1/2 C. Flour
1 Tbl Alum
1/2 C. Salt
3 Tbl Vegetable oil
2 C. Boiling Water
1 Pkg Unsweetened Kool-aid
Combine Flour, Alum, Salt, add Oil, Boiling Water. Stir or kneed to mix. Add food coloring or before liquids, add a package of unsweetened Kool-aid for color and scent.
1 Tbl Alum
1/2 C. Salt
3 Tbl Vegetable oil
2 C. Boiling Water
1 Pkg Unsweetened Kool-aid
Combine Flour, Alum, Salt, add Oil, Boiling Water. Stir or kneed to mix. Add food coloring or before liquids, add a package of unsweetened Kool-aid for color and scent.
Nutty Butter Playdough
1 C. Peanut butter
1 C. Powdered Milk
1 C. Honey
1 C. Oatmeal
Mix together and play and/or eat.
1 C. Powdered Milk
1 C. Honey
1 C. Oatmeal
Mix together and play and/or eat.
Water Paint
Bucket
Water
Sponges
Brushes
Fill bucket with water and use brushes and sponges or other materials to paint water on sidewalk. "Paint" will disappear as it dries. (this has been known to also create wet children.)
Water
Sponges
Brushes
Fill bucket with water and use brushes and sponges or other materials to paint water on sidewalk. "Paint" will disappear as it dries. (this has been known to also create wet children.)
Snow Paint
Food Coloring
Water
Place water and food coloring in empty spray bottle. Let children spray colors on the snow to make designs
Water
Place water and food coloring in empty spray bottle. Let children spray colors on the snow to make designs
Pudding Paint
Instant Vanilla Pudding
Food Coloring
Mix pudding according to directions. Add food coloring for desired color. Finger paint on paper plates. Edible
Food Coloring
Mix pudding according to directions. Add food coloring for desired color. Finger paint on paper plates. Edible
Sand Paint
Tempera Paint (powder)
Sand
Mix dry tempera paint with sand. Let kids spread glue on picture and sprinkle on sand.
Sand
Mix dry tempera paint with sand. Let kids spread glue on picture and sprinkle on sand.
Salt Paint
1/8 C. liquid Starch
1/8 C. Water
1 Tbl Tempera Paint
Mix together and apply to paper with a brush. Keep stirring mixture. Paint will crystallize as it dries.
1/8 C. Water
1 Tbl Tempera Paint
Mix together and apply to paper with a brush. Keep stirring mixture. Paint will crystallize as it dries.
More Soap Paint
1 C. Laundry Soap Flakes
1/4 C. Water
1/3 C. Liquid Starch
Mix together. Beat with a whisk for 3 minutes.
1/4 C. Water
1/3 C. Liquid Starch
Mix together. Beat with a whisk for 3 minutes.
Soap Paint
1 C. Laundry Soap Flakes
1/2 C. Cold Water
Food Coloring
Mix together. Beat with an egg beater until fluffy. Finger paint.
1/2 C. Cold Water
Food Coloring
Mix together. Beat with an egg beater until fluffy. Finger paint.
Puffy Paint
Flour
Salt
Water
Tempera Paint
Mix equal amounts of flour, salt and water. Add liquid tempera paint for color. Pour mixture into squeeze bottles and paint. Mixture will harden in a puffy shape.
Salt
Water
Tempera Paint
Mix equal amounts of flour, salt and water. Add liquid tempera paint for color. Pour mixture into squeeze bottles and paint. Mixture will harden in a puffy shape.
Frosting Playdough
1 Can Frosting Mix
1 1/2 C. Powdered Sugar
1 C. Peanut Butter
Spoon & Bowl
Mix all ingredients in bowl with spoon. knead into workable dough. Model as with any dough.
1 1/2 C. Powdered Sugar
1 C. Peanut Butter
Spoon & Bowl
Mix all ingredients in bowl with spoon. knead into workable dough. Model as with any dough.
Oatmeal Playdough
1 C. Flour
2. C. Oatmeal
1 C. Water
Preparation:
Gradually add water to flour and oatmeal in bowl. Kneed until mixed (this dough is sticky, but unique in texture. Model as with clay.
VARIATIONS:
Add cornmeal in small quantity for texture, Add coffee grounds in small quantity for texture.
2. C. Oatmeal
1 C. Water
Preparation:
Gradually add water to flour and oatmeal in bowl. Kneed until mixed (this dough is sticky, but unique in texture. Model as with clay.
VARIATIONS:
Add cornmeal in small quantity for texture, Add coffee grounds in small quantity for texture.
Jell-O Fingerpaint
any kind of flavored jello
enough boiling water to make it a goo consistency for fingerpaint.
Use you normal fingerpainting material or glossy paper. Kids love the smell and the feel of it.
enough boiling water to make it a goo consistency for fingerpaint.
Use you normal fingerpainting material or glossy paper. Kids love the smell and the feel of it.
Kool-Aid Fingerpaint
2 cups flour
2 packs unsweented kool-aid
1/2 cup salt
3 cups boiling water
3T. oil
Mix wet into dry. The kids love the color change. Then finger paint away.
2 packs unsweented kool-aid
1/2 cup salt
3 cups boiling water
3T. oil
Mix wet into dry. The kids love the color change. Then finger paint away.
Soap Paint
What you need:
Warm water
3 cups Ivory Snow Powder
paint or food coloring
What to do:
1. Add water, a little at a time, to Ivory Snow
2. Mix to consistency of heavy cream
3. Color with small amount of powder paint or food coloring
Warm water
3 cups Ivory Snow Powder
paint or food coloring
What to do:
1. Add water, a little at a time, to Ivory Snow
2. Mix to consistency of heavy cream
3. Color with small amount of powder paint or food coloring
Slime (Silly Putty)
What you need:
1 cup Elmer's glue
liquid starch
What to do:
1. add starch to glue until mixture becomes a pliable ball
2. Store in refrigerator in a covered container
1 cup Elmer's glue
liquid starch
What to do:
1. add starch to glue until mixture becomes a pliable ball
2. Store in refrigerator in a covered container
Cooked Fingerpaint
What you need:
2 cups flour
4 cups cold water
food coloring or dry tempera
What to do:
1. Mix flour and water and cook over low heat until thick
2. Cool
3. Add a pinch of salt
4. Add dry tempera or food coloring, if desired
5. Store in covered jar in refrigerator
2 cups flour
4 cups cold water
food coloring or dry tempera
What to do:
1. Mix flour and water and cook over low heat until thick
2. Cool
3. Add a pinch of salt
4. Add dry tempera or food coloring, if desired
5. Store in covered jar in refrigerator
Uncooked Fingerpaint
What you need:
1/2 cup liquid starch
1/2 cup soap powder
5/8 cup water
What to do:
Beat together until the consistency of whipped potatoes
1/2 cup liquid starch
1/2 cup soap powder
5/8 cup water
What to do:
Beat together until the consistency of whipped potatoes
Cooked Dough
What you need:
4 cups water
4 cups flour
1 cup salt
2 Tbs. cooking oil
4 Tsp. cream of tartar
food coloring
What to do:
1. Combine ingredients
2.Cook in electric skillets, stirring constantly, until most of the moisture is absorbed
3. Store in a covered container (does not need to be refrigerated)
4 cups water
4 cups flour
1 cup salt
2 Tbs. cooking oil
4 Tsp. cream of tartar
food coloring
What to do:
1. Combine ingredients
2.Cook in electric skillets, stirring constantly, until most of the moisture is absorbed
3. Store in a covered container (does not need to be refrigerated)
Uncooked Playdough
What you need:
4 cups flour
1 cup salt
2 Tbs. cooking oil
1 to 1 1/2 cups cold water
food coloring
What to do:
1. Mix flour, salt, oil
2. Add food coloring to water
3. Gradually add water to flour mixture
4. Knead
5. Store in a plastic bag in the refrigerator
4 cups flour
1 cup salt
2 Tbs. cooking oil
1 to 1 1/2 cups cold water
food coloring
What to do:
1. Mix flour, salt, oil
2. Add food coloring to water
3. Gradually add water to flour mixture
4. Knead
5. Store in a plastic bag in the refrigerator
Baked Dough
4 cups flour
1 cup salt
1 1/2- 2 cups water
small pebbles, macaroni, buttons, etc.
condensed milk
food coloring
Preheat oven to 250 degrees F. Mix together flour, salt, and enough water to make a stiff dough. Provide macaroni, etc. to children to press into the dough shapes. Bake completed dough models for one hour. For antiqued effect, brush on condensed milk before baking, or use a mix of condensed milk and food coloring.
Cooked Playdough
1 cup flour
1/2 cup salt
2 tsp cream of tartar
1 cup water
1 T oil
1 tsp food coloring
Combine flour, salt, and cream of tartar in a saucepan. Mix liquids gradually and stir into dry ingredients. When mix is smooth, cook over med. heat, stirring constantly until ball forms. Remove from heat and knead until smooth.
Craft Clay
1 cup cornstarch
2 cups baking soda (a one pound box)
1 1/4 cups water
Combine cornstarch and baking soda in pan. Add water gradually, stirring until smooth. Place mix over med. heat and cook until thick and dough like in consistency, stirring constantly. Turn mix out on a pastry board and knead well. Cover with damp cloth or keep in plastic bag. This is good for plaques and other models that will be painted when dry.
Modeling Goop
2/3 cup water
2 cups salt
1/2 cup water
1 cup cornstarch
beads, colored macaroni and other small objects
Add 2/3 cup water to the salt in a pan, stir and cook over med. heat, stirring 4-5 minutes until salt is dissolved. Remove mix from heat. Gradually mix 1/2 cup water with the cornstarch in a separate container. Stir until smooth. Add the cornstarch mixture to the salt mixture. Return to low heat and stir and cook until smooth. The goop will thicken quickly. Remove from heat and use for modeling objects. Objects made from this goop can also be hardened in the sun. This mix will not crumble when dry. Objects like macaroni, etc. can be added to the goop, and adhered to the models.
Stay-Fresh Playdough
1 cup flour
1/2 cup salt
1 T alum
1 T oil
7/8 cup boiling water
Mix together flour, salt, alum and oil in a bowl. Pour in boiling water. Mix well and knead. Store in the fridge.
1/2 cup salt
1 T alum
1 T oil
7/8 cup boiling water
Mix together flour, salt, alum and oil in a bowl. Pour in boiling water. Mix well and knead. Store in the fridge.
Just Like the Real Playdough
1 cup flour
1 cup water
1 T oil
1 T powdered alum
1/2 cup salt
2 T vanilla
food coloring
Mix all dry ingredients. Add oil and water. Cook over medium heat, stirring constantly until reaching the consistency of mashed potatoes. Remove from heat and add vanilla and food coloring. Divide into balls and work in color by kneading.
Alum Playdough
2 cups flour
1 cup salt
2 T alum
1 cup water
2 T oil
liquid food coloring
Pour dry ingredients into large pan. Stir together to mix. Stir oil and food coloring into the water. Pour liquid into the dry ingredients while mixing, squeezing and kneading the dough. If too sticky, add more flour. Keeps best in the fridge.
Playdough
4 cups flour
1/4 cup powdered tempera
1/4 cup salt
1 1/2 cups water
1 T oil
Mix together flour, powdered paint and salt. Mix water and oil, and food coloring if desired. Gradually stir the water and oil mix into the flour mix. Knead the mix as you add the liquid. Add more water if too stiff, more flour if sticky.
Materials to Collect for the Art Center
- aluminum foil
- ball bearings
- barrel hoops
- beads
- belts
- bottles
- bracelets
- braiding
- brass
- buckles
- burlap
- buttons
- candles
- cartons
- canvas
- cellophane
- chains
- chalk
- chamois
- clay
- cloth
- confetti
- containers
- copper foil
- cord
- corn husks
- corn stalks
- costume jewelry
- crayon pieces
- crystals
- emery cloth
- eyelets
- fabrics
- felt
- felt hats
- flannel
- floor covering
- glass
- gourds
- hat boxes
- hooks
- inner tubes
- jars
- jugs
- lacing
- lampshades
- leather remnants
- linoleum
- macaroni
- magazines
- marbles
- masonite
- metal foil
- mirrors
- muslin
- nails
- necklaces
- neckties
- noodles
- oilcloth
- ornaments
- pans
- paper bags
- paper boxes
- paper cardboard
- paper corregated
- paper dishes
- paper doilies
- paper napkins
- paper newspaper
- paper tissue
- paper towels
- paper tubes
- paper wrapping
- phonograph records
- photographs
- picture frames
- pine cones
- pins
- pipe cleaners
- plastic bags
- plastic paint
- plastic board
- pocket books
- reeds
- ribbon
- rings
- rope
- rubber bands
- rug yarn
- safety pins
- sand
- sandpaper
- seashells
- seeds
- sheepskin
- shoelaces
- shoe polish
- snaps
- sponges
- soaps
- spools
- stockings
- tacks
- tape
- thread
- tiles
- tin cans
- tin foil
- tongue depressors
- towels
- tubes
- twine
- wallpaper
- wax
- wire
- wire eyelets
- wire hairpins
- wire mesh
- wire hooks
- wire paper clips
- wire screen
- wire staples
- wooden beads
- wooden blocks
- wood scraps
- toothpicks
- wool
- yarn
- zippers
Feelie Bags
1/2 cup dippity-do hair gel
food coloring
ziplock bag
Add food coloring and dippity-do to ziplock bag- make sure it is sealed well, and let children manipulate.
food coloring
ziplock bag
Add food coloring and dippity-do to ziplock bag- make sure it is sealed well, and let children manipulate.
Crayons
Put pieces of old crayons of the same or similar colors in a coffee can and set it in a pan of water on the stove. Cook until melted. Pour the wax into a mold and allow to harden.
Gouache Paint
2 cups dextrin (hobby stores have it)
4 T DISTILLED water
1/2 cup honey
2 tsp glycerine
1/2 tsp boric acid solution
powdered or poster paints
Dissolve the dextrin in the water (will be foamy). Then add the honey, glycerine and boric acid. Stir well, or shake in covered jar.
Mix this base with powdered paint or poster paint and store tightly covered. Thin with water if too thick.
Gum for Stamps, Labels and Stickers
1 (1/4 3 ounce packet) of unflavored gelatin
1 T cold water
3 T boiling water
1/2 tsp white peppermint extract
2 drops boric acid solution
Sprinkle the gelatin into the cold water to soften. Pour into the boiling water, stirring until dissolved. Add the remaining ingredients and mix well.
To use glue, brush thinly onto the back of a stamp or some paper and let dry. When applying to paper, just moisten it a bit. To keep, store in a small jar or bottle with a lid. Warm in a pan to turn into a liquid again.
Paperhanger’s Paste
1 cup nonrising wheat flour
1 T powdered alum
1 T powdered rosin (yes, rosin)
1 1/2 cups warm water
4 1/2 cups hot water
1 1/2 cups cold water
8 drops oil of cinnamon
Mix the flour, alum and rosin in a saucepan. Then add the warm water, stirring until smooth. Pour in the hot water and stir vigorously. Place over low heat and boil until the paste becomes thick and clear. Thin with cold water. Add oil as a preservative, if not using immediately.
Papier Mache Paste Number One
1/2 cup nonrising wheat flour
1/4 cup powdered resin glue (available at hobby shops)
1/2 cup warm water
1 1/2 cups hot water
4 drops oil of wintergreen
Mix the flour and resin glue in a saucepan. Slowly pour in the warm water. Then add the hot water and stir vigorously. Cook over low heat stirring until paste is smooth, thick and clear. Should be used in 2-3 days.
Bread Playdough
Cut the crusts off slices of bread and mix with diluted white glue. Form into shapes, animals, etc. When dry, paint and/or shellac.
Nature’s Playdough
1 cup flour
1/2 cup salt
1 cup water
2 T oil
2 T cream of tartar
beet, spinach, and carrot juice
Mix flour, salt and oil, and slowly add the water. Cook over med. heat, stirring until dough becomes stiff. Turn out onto wax paper and let cool. Knead the dough with your hands until of proper consistency. Use as is, or divide into balls and add a few drops of the vegetable juices to make green, pink, and orange.
Rubbery Playdough
2 cups baking soda
1 1/2 cups water
1 cup cornstarch
Mix with a fork until smooth. Boil over medium heat until thick. Spoon onto plate or wax paper.
1 1/2 cups water
1 cup cornstarch
Mix with a fork until smooth. Boil over medium heat until thick. Spoon onto plate or wax paper.
Former Daycare Owner Pleads Guilty of Reckless Endangerment in Infant Death Case
Stories like this make me so sad.
I have to admit that I was a bit spoiled starting out in child care. First I worked at a top-notch Head Start center and then I worked at an NAEYC accredited center with very low teacher:student ratios.
I cannot imagine thinking that I could give any kind of quality care caring for, as Newsday reports, eight infants downstairs and two 3-year-olds and another infant upstairs. That's about seven too many kids if you ask me, based on their ages.
That poor baby. :(
Subscribe to:
Posts (Atom)